The Mission:

I am building an airplane. I really can't tell you how weird it sounds to me to hear those words in my head as I type. I am keeping this blog as an adjunct to my written log, which is required to comply with FAA requirements for Experimental Aircraft construction. My son Doug is my partner in this project. There are two goals: to build the best, safest, and yes, COOLEST, airplane we can, and to allow Doug to acquire some truly awesome experiences, not to mention building skills. Thanks for viewing.


How to use this blog

The most current post is displayed on this opening page. To access the older posts, click on the "Blog Archive" on the right hand side. The drop down menu is arranged by the month and lists the posts, by title and by date posted, in reverse chronological order.

I will arrange the hypertext links to other websites I find interesting better some day, but they are at the bottom.

If you navigate to my first post, there is a link to my luthiery pages. I miss working with wood. Aluminum is nice, but it's boring. Give me a highly figured maple any day!

Friday, August 24, 2012

Wings and cowling depart the plane

John Stahr is going to paint the plane.  In preparation, I finished the nutplates on the wing roots that I had neglected to put on months ago.


And also did some finishing work on the oil door.  Hidden hinge shown here

Then John came over and took the wings and cowling.  Perfectionist that he is, John soon found areas that needed more "work":


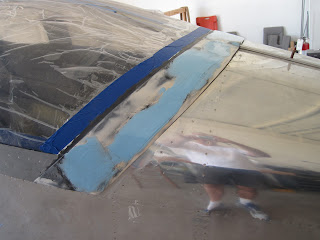
John's taping and perfecting the seam between the wingtip fairing and wing


Applying a first coat of epoxy and paint to inside of cowling


And improving the fit between the fairings and the ailerons

Some work to even up the seam between cowl halves


Meanwhile, I decided to stiffen the oil door, so it won't have a tendency to open itself in flight if there is movement between the cowling and the door.  I made two little stiffeners from foam, and attached them with micro and carbon fiber.  This door is now plenty stiff!


Every once and a while, its fun to step back, and take in the progress.  I keep Deschutes Black Butte porter in the refrigerator in the hangar for these moments...


Rear skirt

While we were waiting for the front fiberglass to harden, we did more work, refining the shape of the rear skirt

microballoons


Once the first layer of microballoons hardened, we sprayed some black paint lightly, sanded, and came back with aeropoxy to fill the low spots


As you can see, the rear skirt is Sika'ed to the canopy

Later, we will transition the fiberglass skirt to the aluminum side skirts...

Windscreen installation

Lots of photos.  


Front plexi positioned and trimmed


Sikaflex to adhere to fuse and rollbar


But first, trace a template for later use to cut glare screen foam


Photo out of sequence, but showing original plan for holding sides in.


Masking


Sitting on the bead of Sika


There are small pieces of garden hose used as spacers under each clamp


Actual method to hold sides of Plexiglass during bonding with Sika


Once the canopy was on with Sika, it was time to do the fairing beneath the front plexi down on to the fuselage


Beginning to define area for scuff sanding


Fortunately for me, the cavalry rode over the hill, to my rescue:  Mike and Doug to help with the mixing and application of flox and fiberglass


Mike applying flox

Small detail that will make more sense later

Doug mixing the epoxy

Flox and fiberglass on.

After the fiberglass and epoxy hardened, we came back and sanded to get a well defined edge.  After that, we re-taped.


Next up, microballoons, and more fiberglass.  Then the roll bar gets a targa strip...


Tuesday, August 7, 2012

First engine start

For many work sessions, any photos I would take would look a lot like this first one.  The work is tedious and incremental.  Hooking the last few wires in.  Connecting the static lines.  Connecting the servos, the throttle, mixture and prop cables.  Etc.  Doesn't make for exciting photography.  At least, that's my excuse.


So, once we got he brake fluid in and bled all the air out of the lines, Doug and I did some "low speed taxi tests" in the hangar, with me (aft) acting as thrust, and Doug applying the brakes.  Since they seemed to work, it was time to get ready for the first engine start.

For a link to the you tube videos I took on my (old) iphone go to:

http://www.youtube.com/watch?v=dHAiKEqm8ss


This is a photo of Doug in his Nomex suit after he did the first engine start.  The sharp eyed among you will notice that he has GROWN a lot in the two years we have been building this airplane.  He has changed and matured greatly since the thirteen year old he was two years ago.


Now on to riveting on the front glare shield and mounting the front canopy windscreen.  This will be transformative for the look of the airplane.